In this tutorial you will learn how to create a an awesome popup gallery. Each gallery will have a small preview animation. This tutorial will provide you with five different popup galleries.
All the main animations are done using CSS transitions. I would of liked to build the entire thing using CSS only but unfortunately this was a pretty complex gallery so i had to use some JavaScript.
I was able to make the gallery responsive by recalculating all images sizing and positioning every time the browser is resized. This is quite a complex tutorial and if you want to use it in your projects i would advise you to read the entire tutorial.
I will only talk about the first example since the other ones have only a few changes in CSS and JavaScript.
HTML
This is the basic html structure:
<div id="fullscreen"> <div id="fullscreen-inner"> <div id="fullscreen-inner-left" class="fullscreen-inner-button"><span class="icon-caret-left"></span></div> <div id="fullscreen-inner-right" class="fullscreen-inner-button"><span class="icon-caret-right"></span></div> <div id="fullscreen-inner-close" class="fullscreen-inner-button"><span class="icon-close"></span></div> <div id="fullscreen-image"> </div> </div> </div>The ‘#fullscreen’ container is used to hold the popup gallery. This element will be hidden by default and only activated using JavaScript. The actual images will be put inside ‘#fullscreen-image’
Next in our tutorial we have to create a holder that will center our example on the screen.
<div id="wrapper"><div id="wrapper-inner"></div></div>I will also add here the next element as well even if it doesn’t have anything to do with our tutorial because it’s just the dropdown that will help you navigate between the provided examples.
<div id="wrapper-inner-selection"> <div id="wrapper-inner-selection-button"> <div id="wrapper-inner-selection-button-dropdown"> <a href="index.php">First Example</a> <a href="index2.php">Second Example</a> <a href="index3.php">Third Example</a> <a href="index4.php">Forth Example</a> <a href="index5.php">Fifth Example</a> </div> Second Example<span class="icon-sort-down"></span> </div></div>A simple title:
data-effect="bounceIn" <div class="wrapper-inner-title">True Story.</div>Think of the example as a row based system. Each row has two columns one for the text and the other for the picture gallery. You will need to put the images inside ‘.wrapper-inner-content-image’.
<div class="wrapper-inner-content"><div class="wrapper-inner-content-image"> <img src="_assets/1.jpg"/> <img src="_assets/2.jpg"/> <img src="_assets/3.jpg"/> <img src="_assets/4.jpg"/> <img src="_assets/5.jpg"/> <img src="_assets/6.jpg"/> <img src="_assets/7.jpg"/> <img src="_assets/8.jpg"/> <div class="wrapper-inner-content-image-hover"> <div class="wrapper-inner-content-image-hover-cercle"> <span class="icon-search"></span> </div>f </div> </div><div class="wrapper-inner-content-text" style="margin-left:35px;"> <p>Morbi faucibus euismod lectus. Morbi rhoncus dignissim tellus eget egestas. Praesent id leo quis massa posuere malesuada nec ut velit. Vivamus tincidunt nunc non sem bibendum posuere. Phasellus commodo dui non sapien aliquam, nec luctus metus ornare. Nullam imperdiet sollicitudin sodales. Morbi quis accumsan enim. Nulla sodales non quam vel dignissim. Donec at ipsum a odio aliquet pellentesque ut ut libero. Sed id dolor nisi. Curabitur eu odio nec tellus scelerisque ultrices ut at nunc. Sed a fringilla ligula.</p> <p>Aenean ullamcorper tortor vitae lorem sollicitudin luctus.</p> </div> </div>Notice that ‘.wrapper-inner-content-image-hover’ class will contain the little magnifying glass icon that appears over the pictures.
CSS
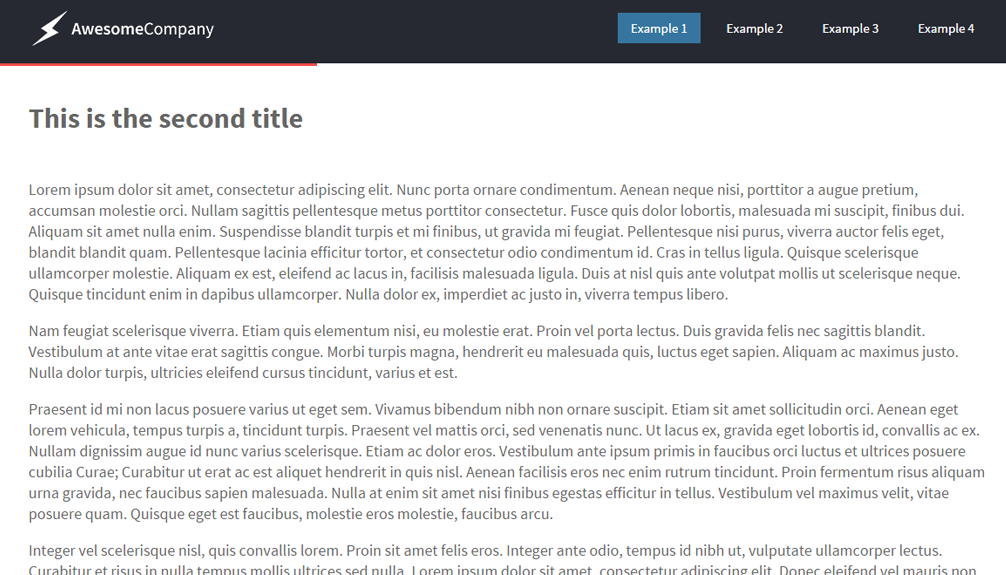
There are two main CSS files attached to this example: ‘main.css’ and ‘pop-up-gallery1.css’. The main CSS file contains some styling for elements like the navigation at the top. ‘pop-up-gallery1.css’ contains all the styles related to the first example. I will only be talking about ‘pop-up-gallery1.css’ here.
First let’s style the ‘#fullscreen’ element. This will be hidden by default and it will be activated when a user clicks on a stack of photos. You will see in the style that i have used a fixed position for this element.
#fullscreen { background-color: rgba(255,255,255,0.8); position: fixed; z-index: 10; left: 0px; top: 0px; height: 100%; width: 100%; -webkit-touch-callout: none; -webkit-user-select: none; -khtml-user-select: none; -moz-user-select: none; -ms-user-select: none; user-select: none; display: none;}‘#fullscreen-inner’ will be inside ‘#fullscreen’ and it will have a relative position because this element will have the next slide, previous slide and close buttons as well as the images in the gallery.
#fullscreen-inner{ position: relative; height: 100%; width: 100%; float: left; background-color: rgba(255,255,255,0.8);}The next thing we will do is style the next slide, previous slide and close buttons.
.fullscreen-inner-button{ height: 35px; width: 35px; background-color: #ffce52; position: absolute; font-size: 18px; line-height: 35px; color: rgba(255,255,255,1); text-align: center; -webkit-transition: all 0.5s; -moz-transition: all 0.5s; -o-transition: all 0.5s; transition: all 0.5s;}.fullscreen-inner-button:hover{ background-color: #FDB800; cursor: pointer; -webkit-border-radius: 35%; -moz-border-radius: 35%; border-radius: 35%;}#fullscreen-inner-left { left: 20px; top: 50%; margin-top: -17.5px;}#fullscreen-inner-right { top: 50%; right: 20px; margin-top: -17.5px;}#fullscreen-inner-close { top: 0px; right: 0px; margin-top: 20px; margin-right: 20px;}‘#fullscreen-image’ will hold the popup images and it will have a relative position.
#fullscreen-image { height: 667px; width: 1000px; margin-left: auto; margin-right: auto; margin-top: 50px; position: relative;}Each image inside ‘#fullscreen-image’ will have an absolute position and it will be centered in the middle but this will be done partially now using CSS and later be completed using JavaScript.
#fullscreen-image img{ position: absolute; left: 50%; top: 50%; -webkit-transition: all 0.5s; -moz-transition: all 0.5s; -o-transition: all 0.5s; transition: all 0.5s; -ms-transform: scale(1.5,1.5); -webkit-transform: scale(1.5,1.5); transform: scale(1.5,1.5); opacity: 0; }This is how the CSS animations looks like for the first example.
#fullscreen-image img:nth-child(1){ -ms-transform: translate(0,-30%) scale(0.6,0.6); -webkit-transform: translate(0,-30%) scale(0.6,0.6); transform: translate(0,-30%) scale(0.6,0.6); z-index: 1; opacity: 0.2;}#fullscreen-image img:nth-child(2){ -ms-transform: translate(0,-20%) scale(0.7,0.7); -webkit-transform: translate(0,-20%) scale(0.7,0.7); transform: translate(0,-20%) scale(0.7,0.7); z-index: 1; opacity: 0.4;} #fullscreen-image img:nth-child(3){ -ms-transform: translate(0,-10%) scale(0.8,0.8); -webkit-transform: translate(0,-10%) scale(0.8,0.8); transform: translate(0,-10%) scale(0.8,0.8); z-index: 2; opacity: 0.6;} #fullscreen-image img:nth-child(4){ -ms-transform: scale(0.9,0.9) ; -webkit-transform: scale(0.9,0.9); transform: scale(0.9,0.9); z-index: 3; opacity: 0.8; } #fullscreen-image img:nth-child(5){ -ms-transform: translate(0,10%) scale(1,1); -webkit-transform: translate(0,10%) scale(1,1); transform: translate(0,10%) scale(1,1); z-index: 4; opacity: 1;}The next block of CSS style will be about the content area.
.wrapper-inner-content-image { float: left; width: 315px; position: relative; height: 180px;}.wrapper-inner-content-image img { width: 315px; position: absolute; left: 0px; top: 0px; -webkit-transition: all 0.3s ; -moz-transition: all 0.3s; -o-transition: all 0.3s; transition: all 0.3s; opacity: 0; }Also the CSS for the small magnifying glass icon in the content area.
.wrapper-inner-content-image-hover { height: 100%; width: 100%; position: absolute; left: 0px; top: 0px; background-color: rgba(255,255,255,0.8); cursor: pointer; opacity : 0; -webkit-transition: all 0.3s; -moz-transition: all 0.3s; -o-transition: all 0.3s; transition: all 0.3s; z-index: 1;}.wrapper-inner-content-image-hover-cercle { position: absolute; left: 50%; top: 50%; height: 50px; width: 50px; background-color: rgba(255,206,82,1); font-size: 25px; line-height: 50px; color: rgba(255,255,255,1); text-align: center; margin-top: -25px; margin-left: -25px; -webkit-border-radius: 50%; -moz-border-radius: 50%; border-radius: 50%; -webkit-transform-origin: center; transform-origin: center; -webkit-animation-duration: 1s; animation-duration: 1s; -webkit-animation-fill-mode: both; animation-fill-mode: both;}.wrapper-inner-content-image:hover .wrapper-inner-content-image-hover{ opacity : 1; -ms-transform: translate(0,10%) scale(1,1); -webkit-transform: translate(0,10%) scale(1,1); transform: translate(0,10%) scale(1,1); }.wrapper-inner-content-image:hover .wrapper-inner-content-image-hover-cercle{ -webkit-animation-name: jello; animation-name: jello;}The CSS preview animation for the photo stack inside the content area is very similar to the one in the popup.
.wrapper-inner-content-image img:nth-child(1){ opacity: 1;}.wrapper-inner-content-image img:nth-child(2){ opacity: 1;}.wrapper-inner-content-image img:nth-child(3){ opacity: 1;}.wrapper-inner-content-image img:nth-child(4){ opacity: 1;} .wrapper-inner-content-image:hover img:nth-child(1){ -ms-transform: translate(0,-20%) scale(0.7,0.7); -webkit-transform: translate(0,-20%) scale(0.7,0.7); transform: translate(0,-20%) scale(0.7,0.7); } .wrapper-inner-content-image:hover img:nth-child(2){ -ms-transform: translate(0,-10%) scale(0.8,0.8); -webkit-transform: translate(0,-10%) scale(0.8,0.8); transform: translate(0,-10%) scale(0.8,0.8); } .wrapper-inner-content-image:hover img:nth-child(3){ -ms-transform: scale(0.9,0.9) ; -webkit-transform: scale(0.9,0.9); transform: scale(0.9,0.9);} .wrapper-inner-content-image:hover img:nth-child(4){ -ms-transform: translate(0,10%) scale(1,1); -webkit-transform: translate(0,10%) scale(1,1); transform: translate(0,10%) scale(1,1);}And finally the CSS animations for the transitions in the popup.
@-webkit-keyframes jello { from, 11.1%, to { -webkit-transform: none; transform: none; } 22.2% { -webkit-transform: skewX(-12.5deg) skewY(-12.5deg); transform: skewX(-12.5deg) skewY(-12.5deg); } 33.3% { -webkit-transform: skewX(6.25deg) skewY(6.25deg); transform: skewX(6.25deg) skewY(6.25deg); } 44.4% { -webkit-transform: skewX(-3.125deg) skewY(-3.125deg); transform: skewX(-3.125deg) skewY(-3.125deg); } 55.5% { -webkit-transform: skewX(1.5625deg) skewY(1.5625deg); transform: skewX(1.5625deg) skewY(1.5625deg); } 66.6% { -webkit-transform: skewX(-0.78125deg) skewY(-0.78125deg); transform: skewX(-0.78125deg) skewY(-0.78125deg); } 77.7% { -webkit-transform: skewX(0.390625deg) skewY(0.390625deg); transform: skewX(0.390625deg) skewY(0.390625deg); } 88.8% { -webkit-transform: skewX(-0.1953125deg) skewY(-0.1953125deg); transform: skewX(-0.1953125deg) skewY(-0.1953125deg); }}@keyframes jello { from, 11.1%, to { -webkit-transform: none; transform: none; } 22.2% { -webkit-transform: skewX(-12.5deg) skewY(-12.5deg); transform: skewX(-12.5deg) skewY(-12.5deg); } 33.3% { -webkit-transform: skewX(6.25deg) skewY(6.25deg); transform: skewX(6.25deg) skewY(6.25deg); } 44.4% { -webkit-transform: skewX(-3.125deg) skewY(-3.125deg); transform: skewX(-3.125deg) skewY(-3.125deg); } 55.5% { -webkit-transform: skewX(1.5625deg) skewY(1.5625deg); transform: skewX(1.5625deg) skewY(1.5625deg); } 66.6% { -webkit-transform: skewX(-0.78125deg) skewY(-0.78125deg); transform: skewX(-0.78125deg) skewY(-0.78125deg); } 77.7% { -webkit-transform: skewX(0.390625deg) skewY(0.390625deg); transform: skewX(0.390625deg) skewY(0.390625deg); } 88.8% { -webkit-transform: skewX(-0.1953125deg) skewY(-0.1953125deg); transform: skewX(-0.1953125deg) skewY(-0.1953125deg); }}@-webkit-keyframes fadeInDown { 0% { opacity: 0; -webkit-transform: translate3d(0, -100%, 0); transform: translate3d(0, -100%, 0); } 100% { opacity: 1; -webkit-transform: none; transform: none; }}@keyframes fadeInDown { 0% { opacity: 0; -webkit-transform: translate3d(0, -100%, 0); transform: translate3d(0, -100%, 0); } 100% { opacity: 1; -webkit-transform: none; transform: none; }}.fadeInDown { -webkit-animation-name: fadeInDown; animation-name: fadeInDown; -webkit-animation-delay: 0.3s; /* Chrome, Safari, Opera */ animation-delay: 0.3s; -webkit-animation-duration: 0.5s; animation-duration: 0.5s; -webkit-animation-fill-mode: both; animation-fill-mode: both;}@-webkit-keyframes fadeOutDown { 0% { opacity: 1; } 100% { opacity: 0; -webkit-transform: translate3d(0, 100%, 0); transform: translate3d(0, 100%, 0); }}@keyframes fadeOutDown { 0% { opacity: 1; } 100% { opacity: 0; -webkit-transform: translate3d(0, 100%, 0); transform: translate3d(0, 100%, 0); }}.fadeOutDown { -webkit-animation-name: fadeOutDown; animation-name: fadeOutDown; -webkit-animation-duration: 0.5s; animation-duration: 0.5s; -webkit-animation-fill-mode: both; animation-fill-mode: both;}@-webkit-keyframes fadeIn { 0% {opacity: 0;} 100% {opacity: 1;}}@keyframes fadeIn { 0% {opacity: 0;} 100% {opacity: 1;}}.fadeIn { -webkit-animation-name: fadeIn; animation-name: fadeIn; -webkit-animation-duration: 0.5s; animation-duration: 0.5s; -webkit-animation-fill-mode: both; animation-fill-mode: both;}@-webkit-keyframes fadeOut { 0% {opacity: 1;} 100% {opacity: 0;}}@keyframes fadeOut { 0% {opacity: 1;} 100% {opacity: 0;}}.fadeOut { -webkit-animation-name: fadeOut; animation-name: fadeOut; -webkit-animation-duration: 0.5s; animation-duration: 0.5s; -webkit-animation-fill-mode: both; animation-fill-mode: both;}JavaScript
First i have to write something that doesn’t add anything to the popup: the JavaScript for the examples navigation.
$('#wrapper-inner-selection-button').click(function() { event.stopPropagation(); $('#wrapper-inner-selection-button-dropdown').fadeToggle(250);}); $('html').click(function() {$('#wrapper-inner-selection-button-dropdown').fadeOut(250);});We have to set the height of each ‘.wrapper-inner-content-image’ equal to the height of the first image that will be shown at the top of the stack and also change the height of the hover element which is activated each time you hover over the stack.
$('.wrapper-inner-content-image').each(function() { var this_element = $(this); this_element.height(this_element.find('img:first-child').height()); this_element.find('.wrapper-inner-content-image-hover').height(this_element.find('img:first-child').height());;});The next part is a very difficult one because we have to resize as well as re-align all the images inside the popup each time the user resizes the window. In order to do this we have to create some variables the most important ones are the ratio of width to height and the ratio of height to width of the image.
function resize_popup(){var window_width = window.innerWidth; var window_height = window.innerHeight; var max_image_width = window.innerWidth - ((35*2)+(window_width/100*40));var max_image_height = window.innerHeight - 200;var image_width = $('#fullscreen-image img').width();var image_height = $('#fullscreen-image img').height();var image_WH_ratio = image_width/image_height;var image_HW_ratio = image_height/image_width;var image_new_width = max_image_height*image_WH_ratio;var image_new_height = max_image_width*image_HW_ratio; $('#fullscreen-image').width(max_image_width);$('#fullscreen-image').height(max_image_height);if(max_image_width > 2 && max_image_height > 2){if(image_new_height>max_image_height){ $('#fullscreen-image img').width(image_new_width);$('#fullscreen-image img').height(max_image_height);$('#fullscreen-image img').css('margin-top',-max_image_height/2);$('#fullscreen-image img').css('margin-left',-image_new_width/2); }else{ $('#fullscreen-image img').width(max_image_width);$('#fullscreen-image img').height(image_new_height);$('#fullscreen-image img').css('margin-top',-image_new_height/2); $('#fullscreen-image img').css('margin-left',-max_image_width/2); }}}When the user clicks on a gallery all the images inside ‘#fullscreen-image’ are removed and images that where clicked on are cloned inside ‘#fullscreen-image’. After doing this we display ‘#fullscreen’ and apply the proper styling. I will wrap the opening and the closing of the popup in a nice function.
function open_close_gallery(){ var this_element = ''; $('.wrapper-inner-content-image-hover').click(function() { $('#fullscreen-image').find('img').remove(); this_element = $(this); this_element.parent().find('img').clone().appendTo('#fullscreen-image'); $('#fullscreen').show(); $('#fullscreen').removeClass('fadeOut').addClass('fadeIn'); $('#fullscreen-image').removeClass('fadeOutDown').addClass('fadeInDown'); resize_popup(); }); $('#fullscreen-inner-close').click(function() { $('#fullscreen').removeClass('fadeIn').addClass('fadeOut').delay(500).hide(0); $('#fullscreen-image').removeClass('fadeInDown').addClass('fadeOutDown'); }); }The changeling of the images inside the popup is done very easily probably easier than you imagined and this is valid for all the the five examples. The images are changed just by moving the last image to the top of image list.
function next_slide(){$('#fullscreen-image img:last-child').insertBefore( $('#fullscreen-image img:first-child') );}function previous_slide(){$('#fullscreen-image img:first-child').insertAfter( $('#fullscreen-image img:last-child') );}Because i don’t like galleries that don’t have keyboard arrow control i just had to add it to my tutorial.
$(document).keydown(function(e) { switch(e.which) { case 37: // left previous_slide(); break; case 38: // up next_slide(); break; case 39: // right next_slide(); break; case 40: // down previous_slide(); break; default: return; // exit this handler for other keys } e.preventDefault(); // prevent the default action (scroll / move caret)});The last thing we have to do is to instantiate all the functions and create click functions for next slide and previous slide buttons.
resize_popup();$( window ).resize(function() {resize_popup();});open_close_gallery(); $('#fullscreen-inner-right').click(function() { next_slide();}); $('#fullscreen-inner-left').click(function() { previous_slide();});Subscribe to our newsletter to get notified when there is a new tutorial.